SendGrid Account Setup
To complete the setup process for integrating SendGrid with iCRM for sending campaigns, the following subprocesses need to be followed
1: Create SendGrid Account
- Sign up for a SendGrid account at sendgrid.com.
- Verify your email address and complete any necessary onboarding steps.
This is done from the Infra side, please contact Infra support.
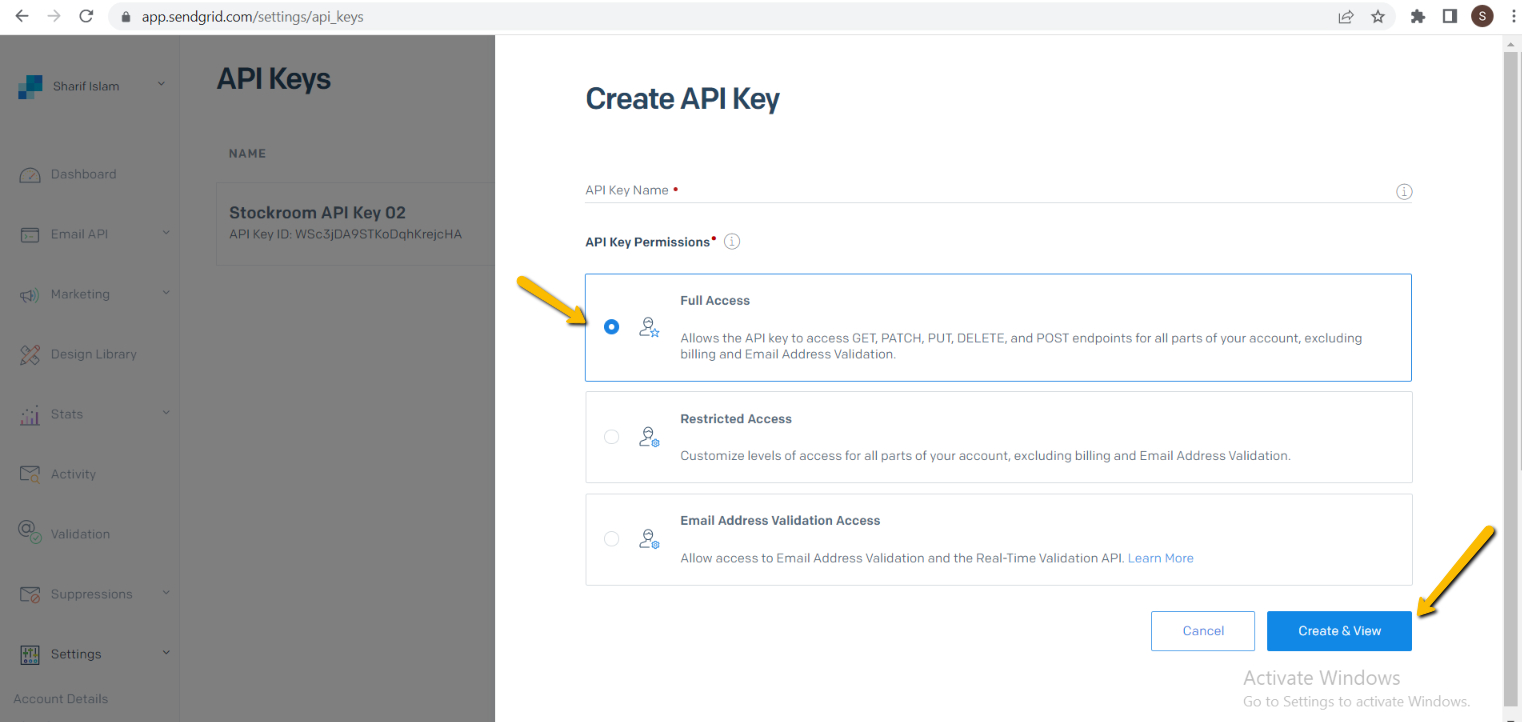
2: Generate API Key
- Log in to your SendGrid account.
- Navigate to the “Settings” tab.
- Select “API Keys” and click on “Create API Key”.
- Name your API Key and provide the necessary permissions.
- Save the generated API Key securely.
Note: Select Full Action mode while generating the API key
URL: https://app.sendgrid.com/settings/api_keys
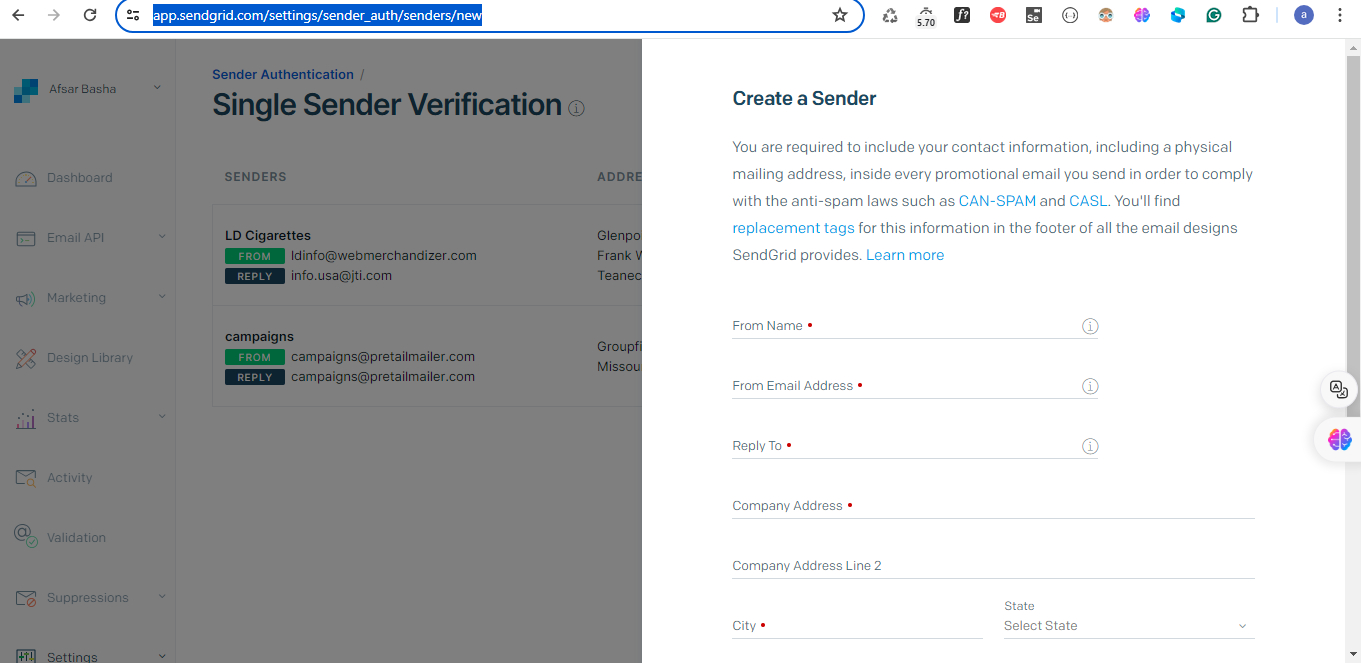
3: Configure Sender Email
- Log in to your SendGrid account.
- Navigate to the “Settings” tab.
- Select “Sender Authentication” and click on “Verify Sender Email”.
- Fill in the details and provide the necessary information.
- Save the configuration.
URL: https://app.sendgrid.com/settings/sender_auth/senders/new
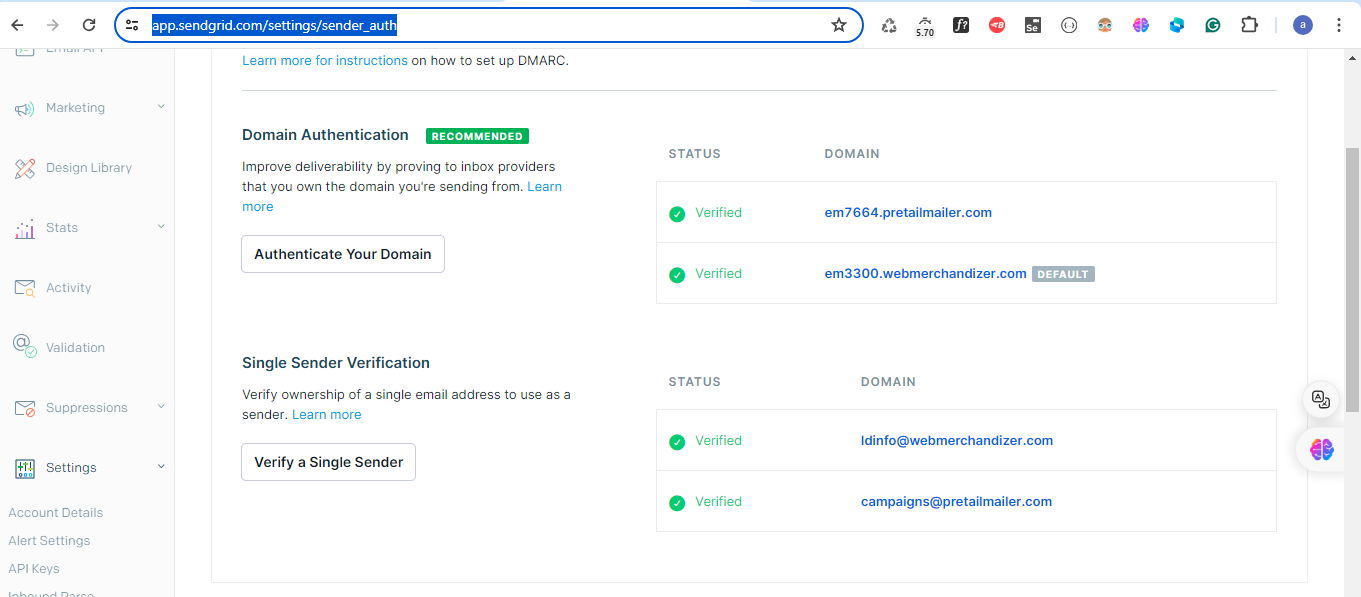
4: Authenticate & Verify Sender Email
- Log in to your SendGrid account.
- Navigate to the “Settings” tab.
- Select “Sender Authentication” and click on “Verify Sender Email”.
- Follow the steps to Authenticate & Verify the Sender Email.
5: Domain Authentication
- Log in to your SendGrid account.
- Navigate to the “Settings” tab.
- Select “Sender Authentication” and choose “Authenticate Your Domain”.
- Follow the steps to authenticate your domain to improve email deliverability.
6: IP Access Management
- Log in to your SendGrid account.
- Navigate to the “Settings” tab.
- Select “IP Access Management” and choose “Add IP Address”.
- Follow the steps to Add the IP address to access.


