


Login to the application and select “Data Migration” module from application home page.
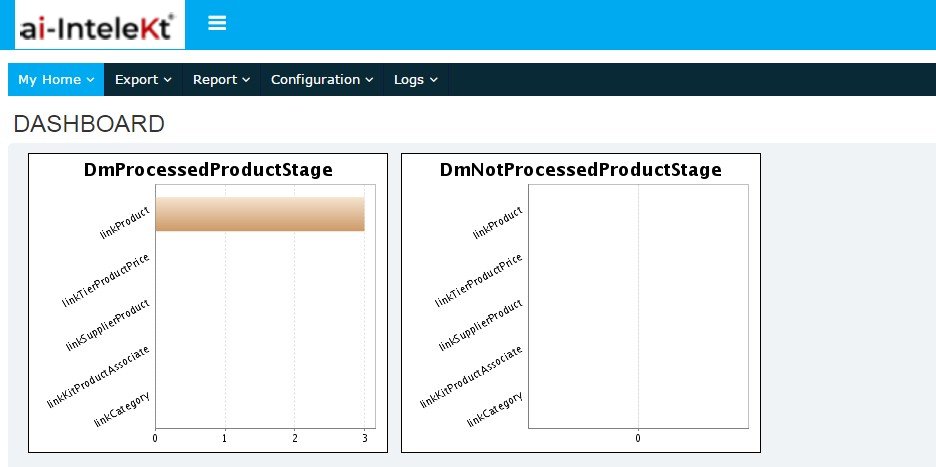
Data Migration home page will be displayed.
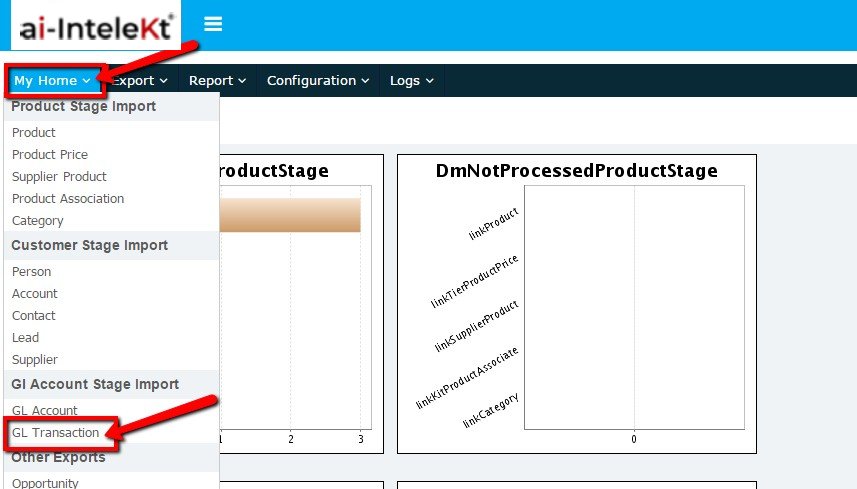
To import budget data into GL, select “GL Transaction” from “My Home” tab.
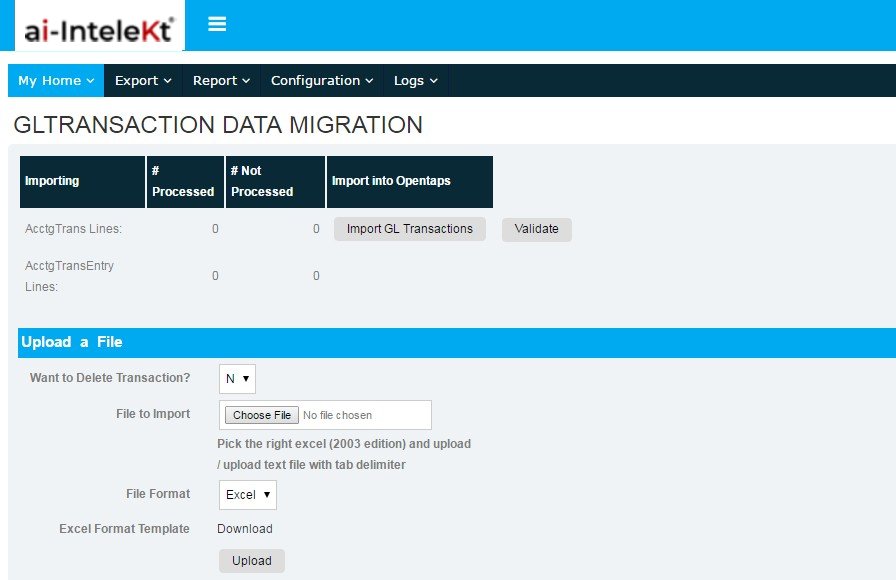
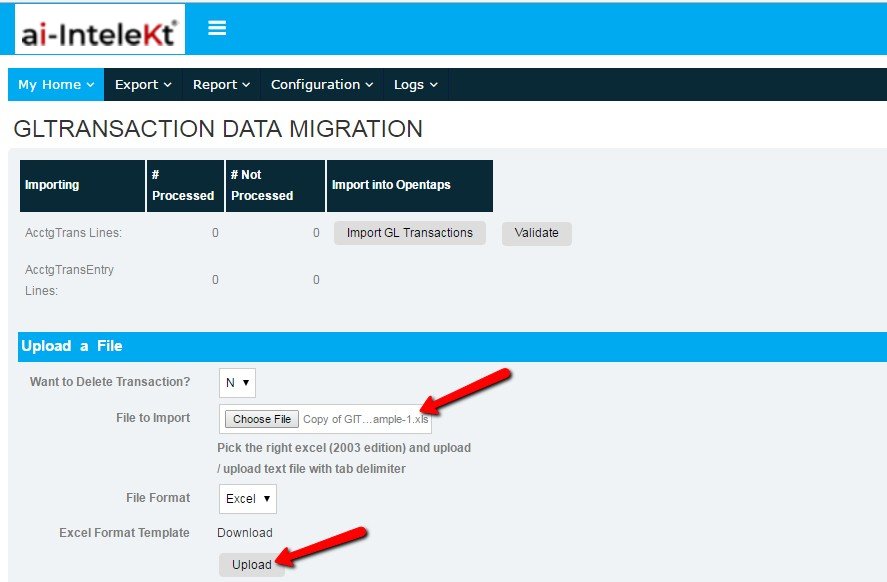
GL Transaction import page will be displayed.
In Upload a File section, select “Download” button to get an Excel Format Template.
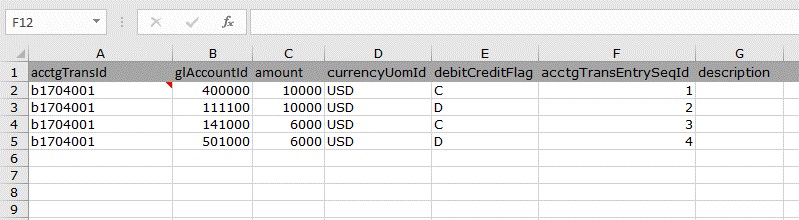
Using the template downloaded, enter the following GL transaction details for budget data in the excel.
In ‘AcctgTransFeed’:
In ‘AcctgTransEntryFeed’:
After entering the details in the excel, save the data in your local system.
In ‘GL Transaction import page’,
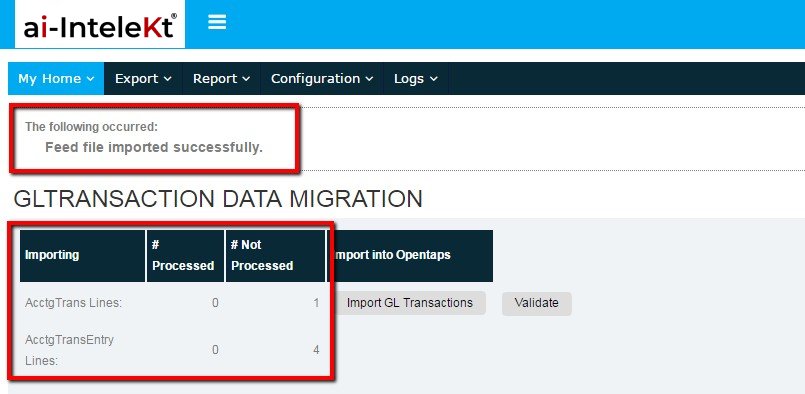
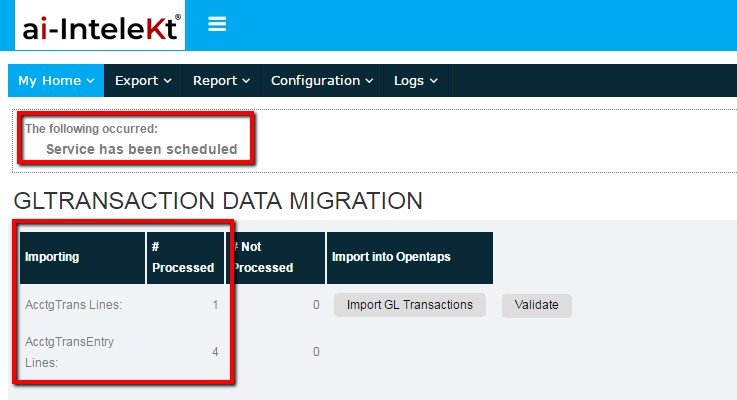
3. Once uploaded, the status will be displayed in “Not Processed” for the uploaded file.
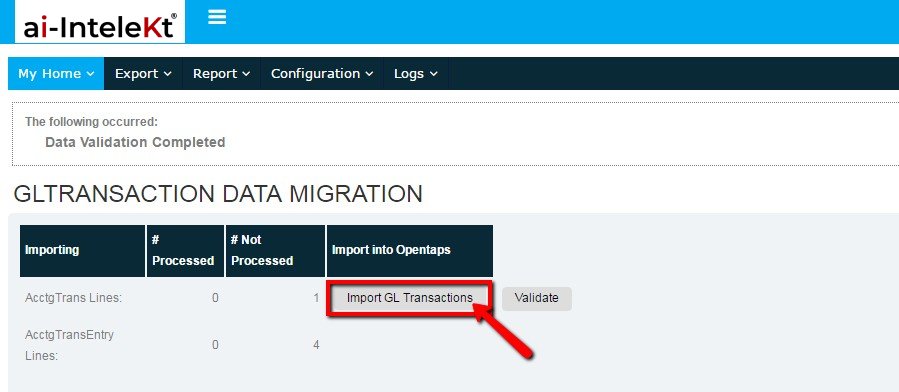
4. Select “Validate” button to validate the data.
5. Select “Import GL Transactions” button to import GL transaction data.
6. “OrganisationPartyId” and click on “Run Import” button.
7. The data will be imported and will be displayed in “Processed” status.
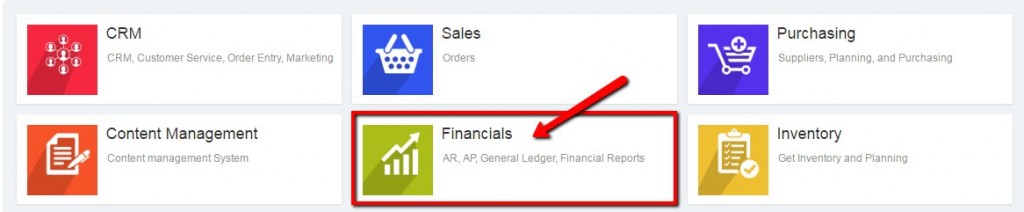
To view the transaction imported, select “Financials” module.
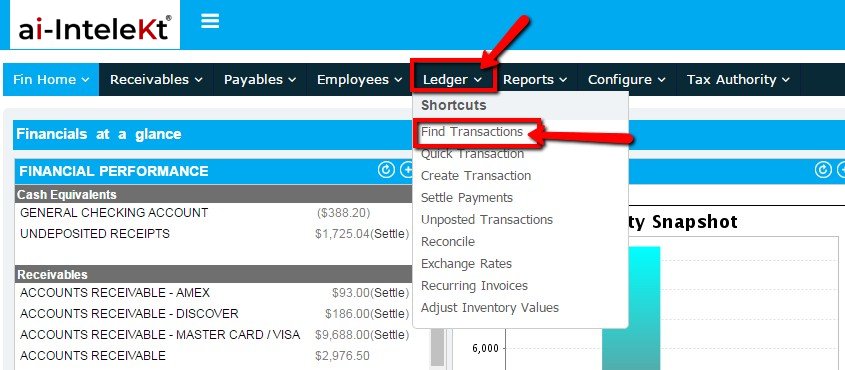
In Financials home page, select “Find Transaction” link from “Ledger” tab.
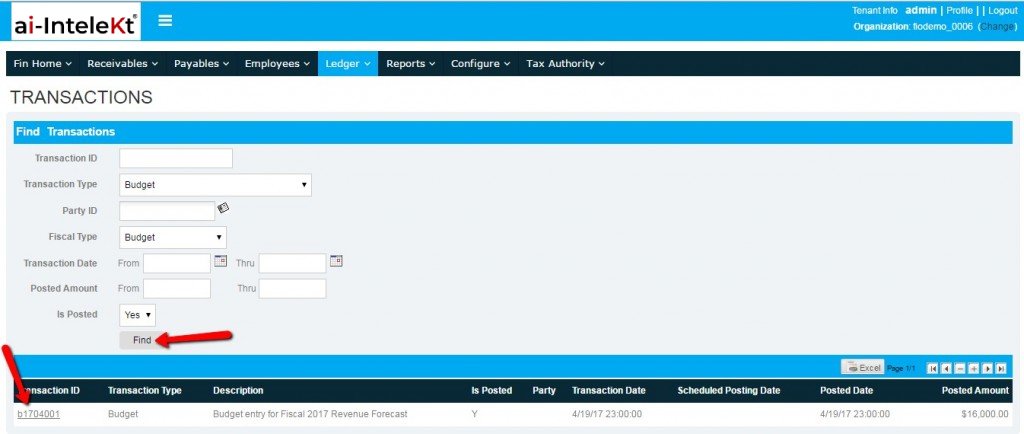
In Transactions page, find the transaction imported.
The transaction list will be displayed.
Select the transaction id imported from the to view the transaction details
The transaction page will be displayed as shown below:
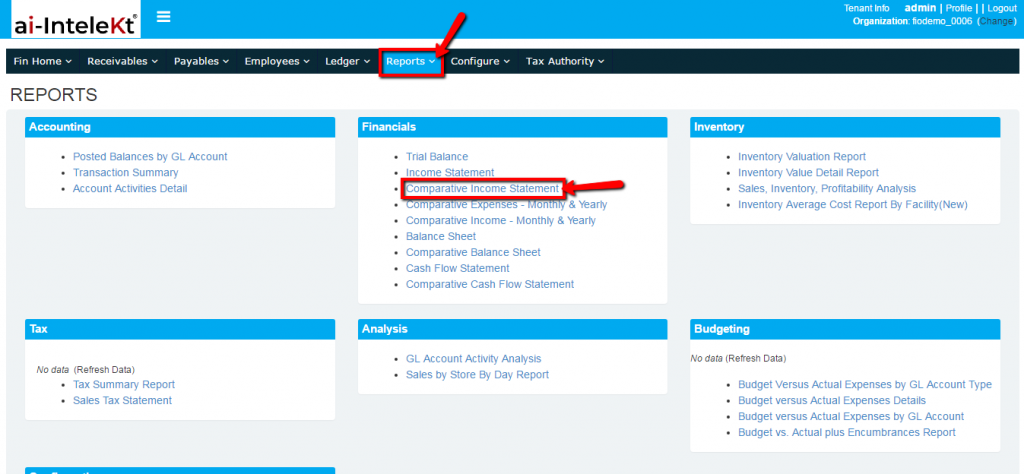
To view comparative income statement, In Financials module select “Reports” tab.
In reports page, “Comparative Income Statement” link.
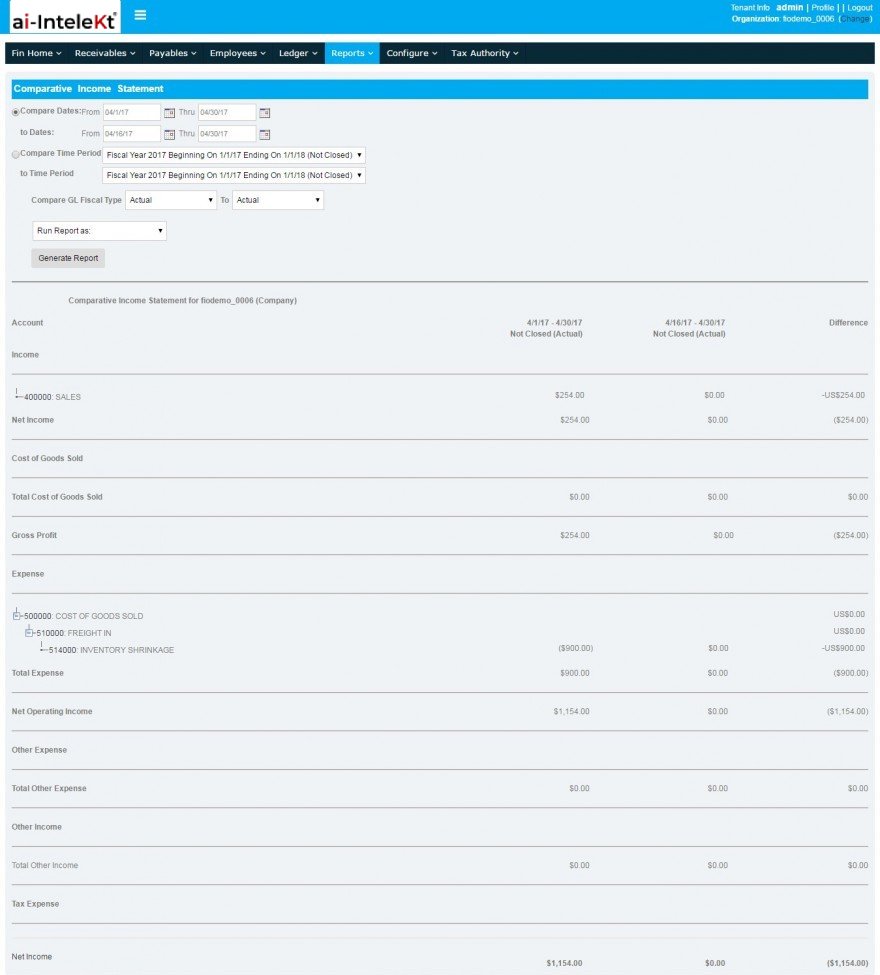
In Comparative Income Statement page, Enter the details and click on “Generate Reports” buttons.
The transaction details will be displayed as shown below: