
E-Receipt End-to-End Checklist Flow
Store Receipt Configuration
1: Setup Store Receipts in iCRM:
To set store receipts in iCRM, follow the below steps
- Log in to your iCRM Application.
- Navigate to the “Loyalty” Component.
- Under Loyalty Component, navigate to the “Store Receipts” and choose “Create Store Receipt” Sub Menu.
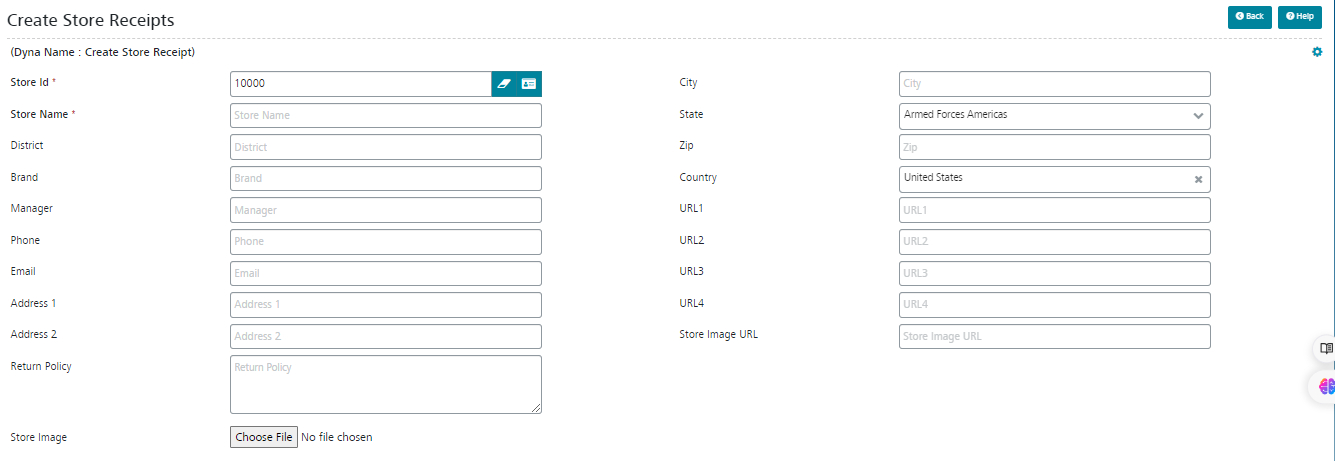
- Under the Create Store Receipt form, fill in the below details and submit the form.
Form Fields Details
- Store ID – Supposed to be iCRM Store ID, Choose from the Picker
- Additional Note to support for different vendor API – (Product_store_id for Meadows will be Organization ID and for Indica will be Office ID)
- Store Name – Enter the Store Name
- Enter other details which are required (Phone, Email, Address 1 & Address 2 & Store Image URL)
- Load the image which is required for the store
- Enter the Store HTML
- Save the form and create the store.
2: Upload Store Receipts for Bulk Load:
To Upload store receipts in iCRM, follow the below steps
- Log in to your iCRM Application.
- Navigate to the “Loyalty” Component.
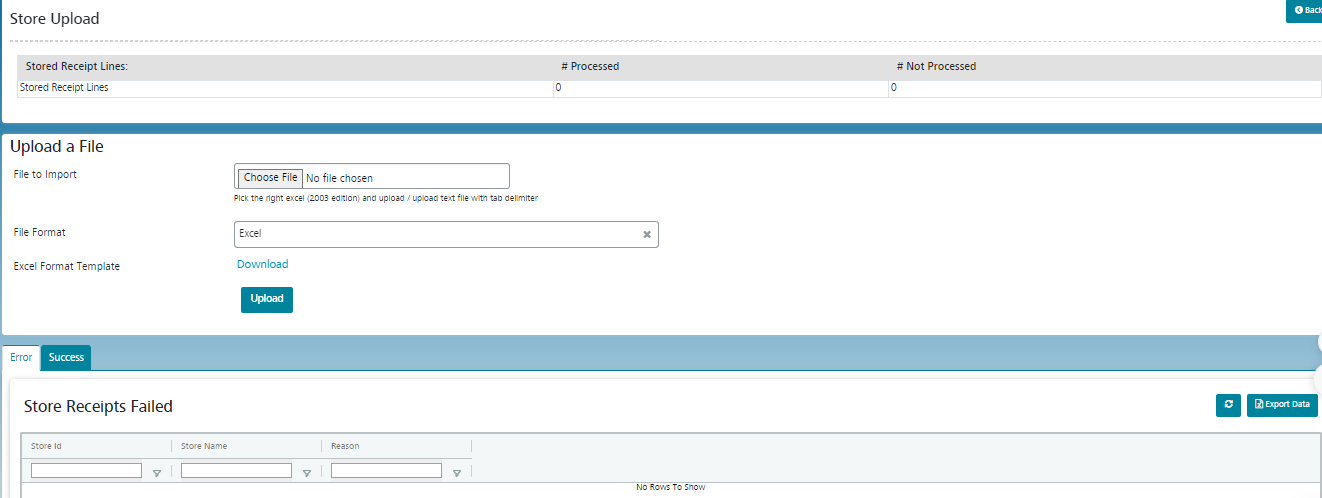
- Under Loyalty Component, navigate to the “Store Upload”.
- In the Store Upload Screen, you can see the “Download” button.
- Click on the “Download” button to download the sample file.
Upload Process:
The file format should be. Xls Click the “Download” button to get a sample format for the file. Use this sample format to prepare your list. Once you have prepared your file, upload it using the “Upload” button.
After uploading the CSV file, click on the “Process” button in the top right corner to start the list processing. This will ensure that your list is correctly mapped and imported into the list.
Once the upload is completed, the results will show on the Same screen.
Inner Template Setup
1: Configure Inner Template Setup in iCRM:
Inner templates in Ereceipt refer to the predefined layouts and designs for different sections of the receipt, in this section, we are going to configure the Receipt detail Section as: Order HTML
It is the Free marker template, so it is standard for Order HTML,
Use the below order HTML file and create the Template
NOTE: Choose Template category as – Order Inner Template
Below are the steps to create the templates in iCRM, After creating the template in the HTML section, copy and paste the order_html
To create templates in iCRM, follow the below steps
- Log in to your iCRM Application.
- Navigate to the “Campaign Manager” Component.
- Select the “Create Template” menu under the campaign manager
Details:
To fill the fields on the Create template page, follow these steps:
- Name: Enter the name of the template.
- Sender Full Name: Select the client’s name for this template. The sender’s email will be automatically selected after you choose the sender’s name.
- Email Engine: Select “Send Grid” as the email engine.
- Format: Choose “Text and HTML” as the format for the template.
- Reply-To Full Name: Select the Full name for this template. The Reply-To email will be automatically selected after you choose the Reply-To Full Name.
- Charest: Select “Unicode (UTF-8)” as the character set for the template.
- External Template: Select the template from Send Grid, and the subject line will be automatically added.
2: Configure Product Upsell Templates Setup in iCRM:
Product Upsell templates in Ereceipt refer to the predefined layouts and designs for different sections of the receipt, in this section, we are going to configure the Receipt detail Section as Product Upsell HTML
It is the Free marker template, so it is standard for Product Upsell HTML,
Use the below Product Upsell HTML file and create the Template
NOTE: Choose Template category as – Product Upsell
Below are the steps to create the templates in iCRM, After creating the template in the HTML section, copy and paste the order_html
To create templates in iCRM, follow the below steps
- Log in to your iCRM Application.
- Navigate to the “Campaign Manager” Component.
- Select the “Create Template” menu under the campaign manager
Details:
To fill the fields on the Create template page, follow these steps:
- Name: Enter the name of the template.
- Sender Full Name: Select the client’s name for this template. The sender’s email will be automatically selected after you choose the sender’s name.
- Email Engine: Select “Send Grid” as the email engine.
- Format: Choose “Text and HTML” as the format for the template.
- Reply-To Full Name: Select the Full name for this template. The Reply-To email will be automatically selected after you choose the Reply-To Full Name.
- Charest: Select “Unicode (UTF-8)” as the character set for the template.
- External Template: Select the template from Send Grid, and the subject line will be automatically added.
The following are the available dynamic variables:
All fields available from the product entity
- prodList: Array
- prod.mediumImageUrl
- prod.productName
- prod.productPrice
3: Inner Template Tags Setup in iCRM:
To Configure Inner Template tags, Please follow the below steps:
- Log in to your iCRM Application.
- Navigate to the “Campaign Manager” Component.
- Under Campaign Manager, navigate to the “Configuration” and choose ” Personalization tag configuration ” Sub Menu.
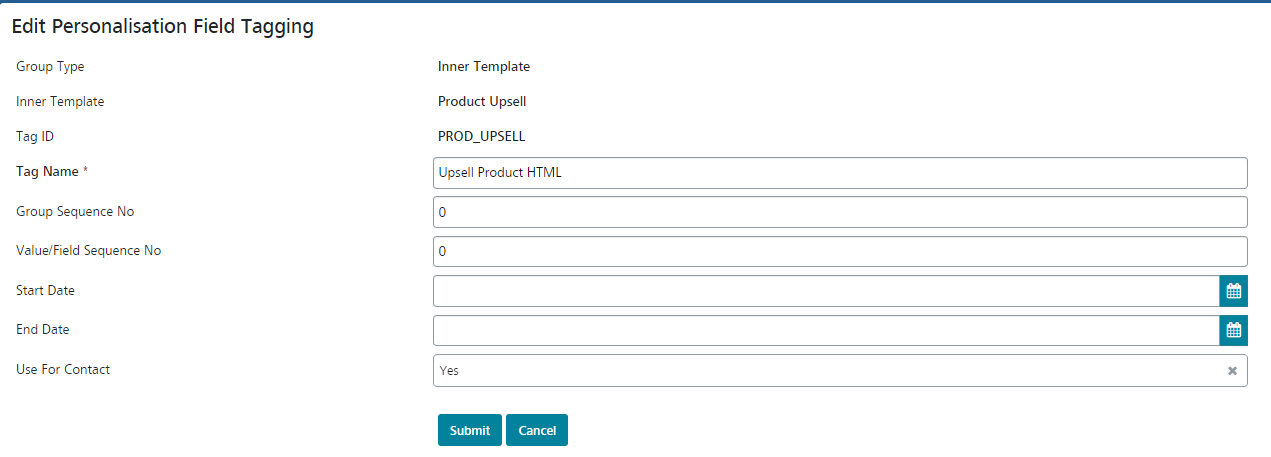
Under the Personalization tag configuration, fill in the below details and submit the form
- Tag Type – Choose Tag Type as Inner Template.
- Inner Type – Select the Inner Template from the Picker
- Tag ID – Once the Inner Template is selected the Tag ID will be populated automatically
- Tag Name – Enter the Tag Name
- Group Sequence No – Enter the Sequence Number
- Provide the Start and End date and save the form.
4: Upsell Product Configuration Setup in iCRM:
To Configure Upsell Product Configuration, please follow the below steps
Method 1: Global Parameter ID = PROD_UPSELL (Configure the Product ID with comma-separated values)
Method 2: Configure Upsell Products based on the individual customers.
Customer-specific configuration:
Path: View customer > persona > attributes
Dynamic Messages
Sub Process 1: E-Receipt Banner Configuration in iCRM:
Global Level:
- To Configure the E-Receipt Banner, Follow the below steps:
- Under the segmentation component, Create Segment code.
- Under the Segment code – Create a Segment value
- While Creating the Segment value, add the Image URL in the Value Capture field.
- If multiple banners are needed, then create multiple values and add the Image URL.
Sub Process 2: Banner association with Customer:
Customer Level:
Path: View customer > persona > Segmentation – Add the Value for Segment code.
System Configuration
1: Global Configuration in iCRM:
- CURRENCY_UOM_ID: Default Currency UOM ID for Order (Global Configuration for Currency)
- DEFAULT_STORE_ID: Default Store (Global Configuration for Store)
- IS_IMP_PROD_ORD: Import product during order extraction (Its Flag Y/N Value)
- IS_IMP_CUST_ORD: Import customer during order extraction (Its Flag Y/N Value)
- ER_ORDHTML_TPL_ID: Ereceipt Order HTML Template ID (Provide the HTML Template ID)
- ER_ORD_STATUS: Ereceipt order status (comma-separated values) for Meadow: fulfilled
- IS_IMP_CAT_PROD: Import category during product extraction (Its Flag Y/N Value)
- PROD_UPSELL_GPID: Upsell Products – Attribute Group ID (Configure Attribute Group ID)
- PROD_UPSELL: Upsell Products – Default (Comma separated product IDs) – Configure the List of Products
- ER_ORDHTML_TPL_ID: Ereceipt Order HTML Template ID (Provide ORDER HTML Template ID)
- SENDGRID_ENABLED: Enable Send Grid (Y/N) – Enabling of Send Grid Integration
- DFLT_ERCPT_EMAIL: For testing purposes, you can configure – Default ereceipt emails (comma separated) – This is for testing purposes add email in comma Separated.
2: Channel Access Configuration in iCRM:
To Configure channel Access settings, use the below Table
Table Name: Channel_Access
Sample Seed:
ChannelAccess
channelAccessId=”MEADOW_API”
merchantIdentifier=”CRS_01″
merchantName=”CRS_01″
userName=” Consumer-Key “
password=” Client-Key ”
accessToken=””
channelAccessUrl=”https://api-staging.getmeadow.com/api/v1″ />
3: API Configuration in iCRM:
To Configure API keys into ICRM, follow the below steps.
- Log in to your iCRM Application.
- Navigate to the “Admin” Component.
- Under Admin Component, navigate to the “SendGrid Configuration Main Menu” and choose “SendGrid Setup” Sub Menu.
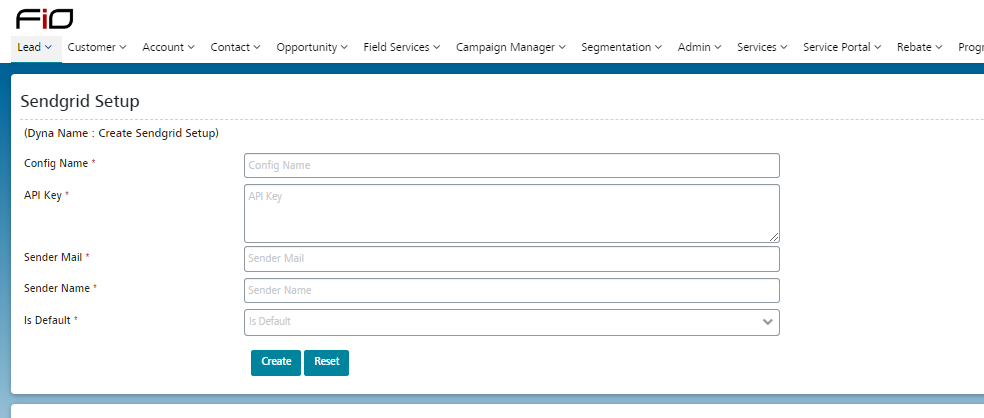
Navigate to the SendGrid Setup screen in iCRM.
Fill in the following fields:
- Configuration Name: Type “Vendor API for [Your Client Name]”.
- API Key: Paste the API key you generated from the Vendor.
- Sender Mail: Enter the sender email address configured in Vendor.
- Sender Name: Enter the sender’s name configured in Vendor.
- Is Default: Select N.
Save the configuration to apply the settings